Click the blue "Enter Expense Report" button in the "Expense Reports" section For SRS role, navigate to Transactions > Employees and click on "Enter Expense Reports"
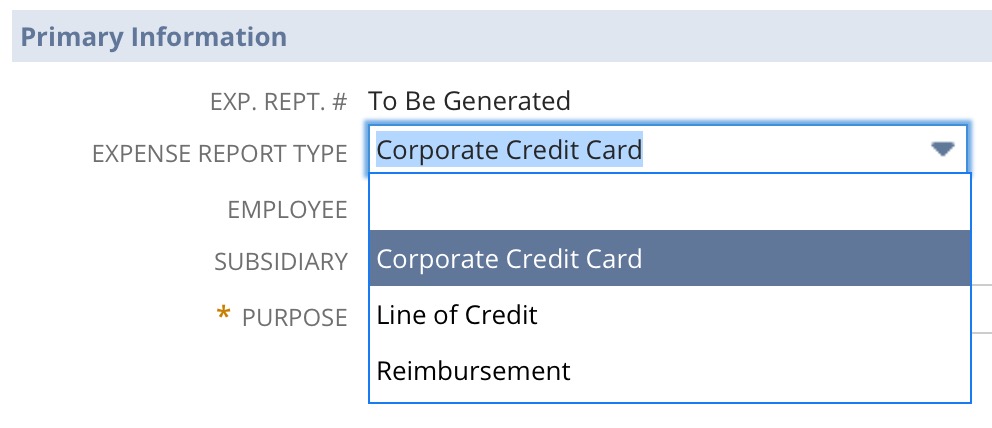
Select the "Expense Report Type" (only use"Line of Credit" if you are booking travel through Melon and don't have a corporate credit card)
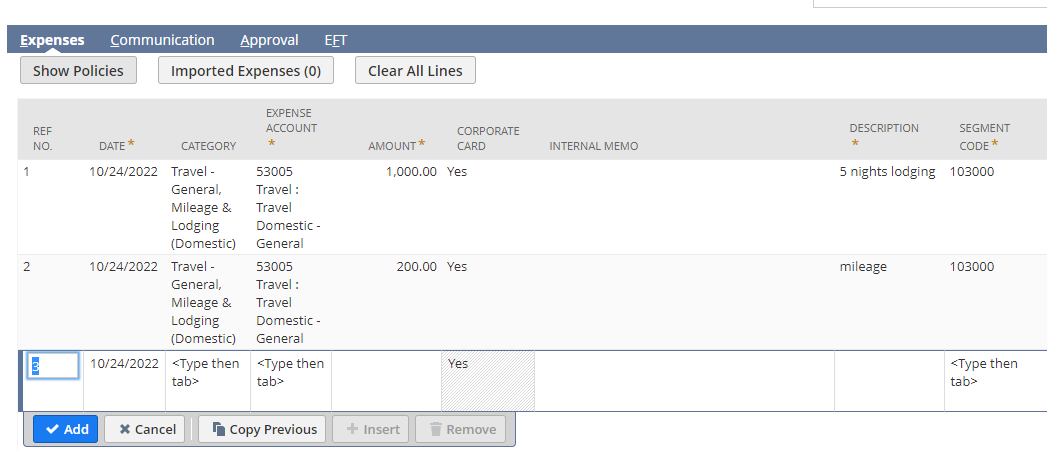
Enter the purpose of the report in the "purpose" field (e.g. "travel to a conference in Boston 7/25/2020")
In the table below, select a category and enter the amount, description, and segment code (project number). Click the blue Add button for additional lines and then again once the final line item has been entered to finalize the total.
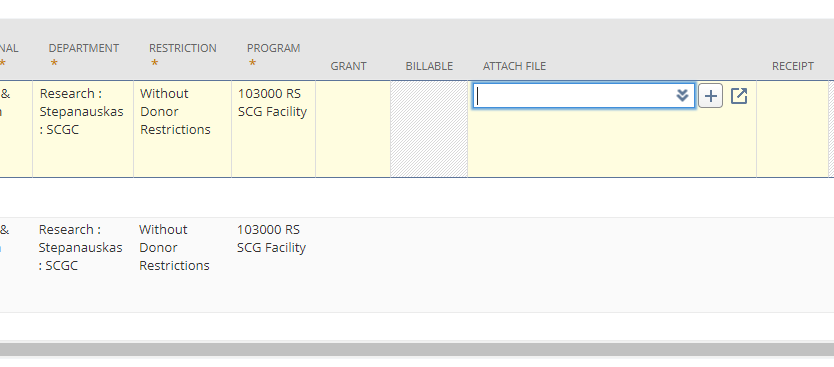
Attach a receipt to each line in the "attach file" column:
Click on the "+" to the right of the Attach File field
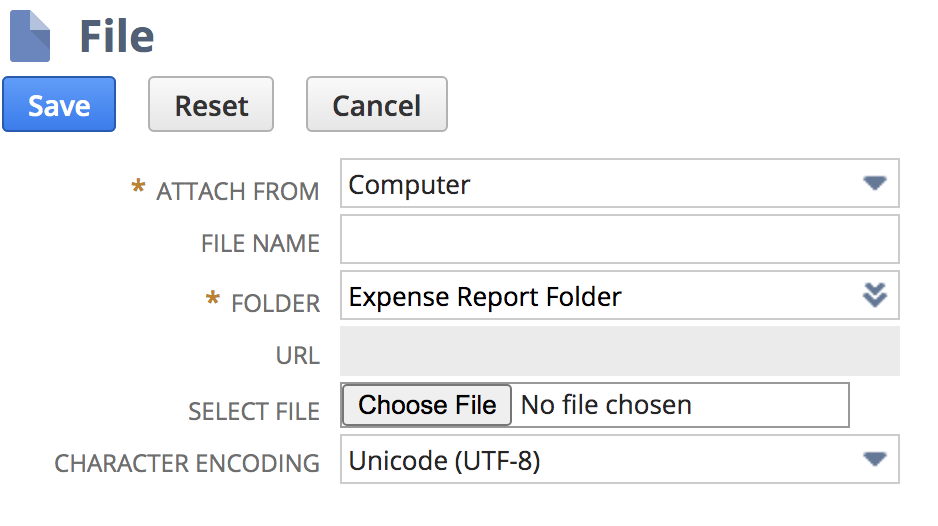
Select Expense Report Folder as the folder
Select and upload a file and then click blue Save button
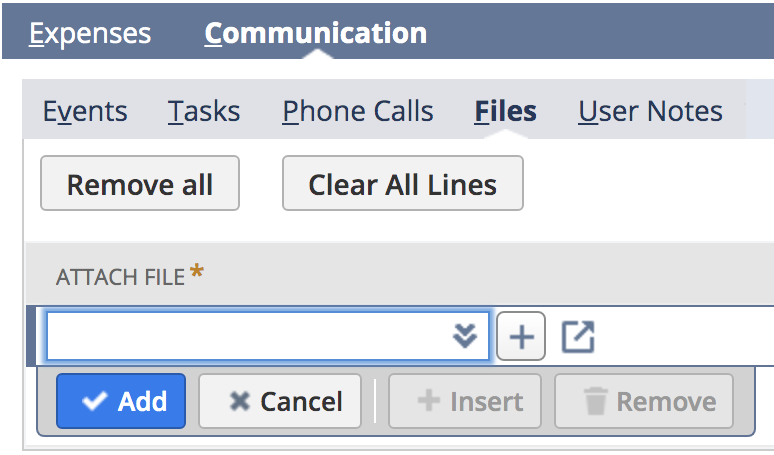
You can also go to Communication > Files to attach multiple receipts and other relevant documentation
When complete, click the blue Save & Submit for Approval button (if you select Save the document will still be in edit mode and will not enter the approval process)
View expense reports
In the "Expense Reports" section of your dashboard, note the status is "pending approval". If the status is "in progress" that means you've saved the ER, but haven't submitted it for approval.
If you do not have access to supporting documentation (or receipts have been misplaced), please use the missing receipt form.