General
Best Practices
Helpdesk Request Form
Welcome
Event Procedure
Lab Closure Procedure
Links
Resource Drive Conventions
Resource Map
Shipping (FedEx)
Shipping (International)
Suggestion Box
Support Article Guidelines
Information Technology
Email & Calendar
Add Calendars to iPhone
Calendar Resources
Confidential emails
Create a Shared Calendar
Create an Email Group
Email Filters & Rules
Email Groups
Email Headers
Email Signatures
Google 2-Step Verification
Google Calendar Overview
Phishing
Schedule emails
Staff Minus One Emails
Using Outlook with Gmail
Yubico Security Keys
Print & Fax
Software
1Password
Adobe Acrobat DC
Adobe Creative Cloud
ArcGIS
Colby VPN
Combine PDFs in Adobe Acrobat
Excel Trust Settings
Install Falcon Antivirus
Microsoft Office
Microsoft Office Runtime Error Fix
Mosyle Mac Enrollment
Raiser's Edge
Slack
Software Resources
Uninstall OpenVPN
Windows 10 - Restore from backup
Updates
2020 December - email name spoofing
2020 October - COVID resources
2021 December - WiFi
2021 January - Zoom recording + private chat
2021 March - NetSuite Google authentication
2021 March - VPN Upgrade
2023 - Zoom Updates
2024 May - VPN SSO
Account Access
Artificial Intelligence
DNS
Data Storage and Computer Backups
Filling PDFs
Google Drive
HPCC and Storage Proposal Information
Intercom
Laptop Recommendations
Loaner Hardware
Migrating data from Storage to Google Drive
Passwords
Phones
Restoring Files
Storage
VPN
Vendor Access
Website Request
WiFi
Zeiss Digital Classroom
HR & Payroll
Paid Time Off
Payroll Overview & FAQ
Personnel Offboarding
Personnel Onboarding
Timesheet Approval (supervisors)
Timesheets
Facilities
Finance
Admin
Budget & Reports
Invoicing
Policies & Procedures
Advancement Entry of Donations and Pledges
Corporate Traveler / Melon
Gas and Cryo-Supply Ordering Process and Form Link
Purchasing Flowchart - for staff reference
Purchasing Policy
Vendors Exempt from Purchase Orders
Proposals
Purchase & Expense
Bill/Invoice Approval
Creating a Bill to be Paid
Equipment Capitalization Help
Expense Report
Expense Report (example)
Non-Employee Reimbursement
Purchase Order
Purchase Order (example)
Purchase Order (supplemental)
Recurring Purchase Order (SRS)
Amazon.com
Approval Reminders
Business Office Orientation
Capital One - Corporate Credit Card
Customize Dashboard
Dashboard (SRS)
NetSuite FAQ
NetSuite Login
NetSuite shortcuts
Revenue Flow Chart
StaplesAdvantage.com
Workshop, Training Projects, and Participant Support Help
Computing
Software
AAI Calculation
ANI Calculation
AlphaFold
Anvi'o
Conda environments
Jupyter notebook
Prokka
RStudio
dada2
sag-mg-recruit
Job management
Charlie Overview
Connect to Charlie
Edit with VS Code
Getting Started
Monitor jobs
Software modules
Transfer files
Zoom
Zoom Overview
Zoom Room Instructions
Closed Captions
Join Teams or WebEx meeting from a Zoom Room
Schedule a Zoom Meeting
Screen Share (Dummy HDMI)
Screen Share (Presenter Mode)
Sign Up and Download Zoom
Zoom Room: Alfond Room
Zoom Room: Commons
Zoom Room: Conference Rooms
Zoom Room: Forum and Classrooms
Zoom Room: Sage Meeting Room
Zoom Room: Teaching Laboratory
- Home
- Finance
- Invoicing
- External Invoice (create)
External Invoice (create)
Updated
- Log into NetSuite (netsuite.bigelow.org)
- Enter your email address and password
- Navigate to Transactions > Sales and click on "Create Invoice"
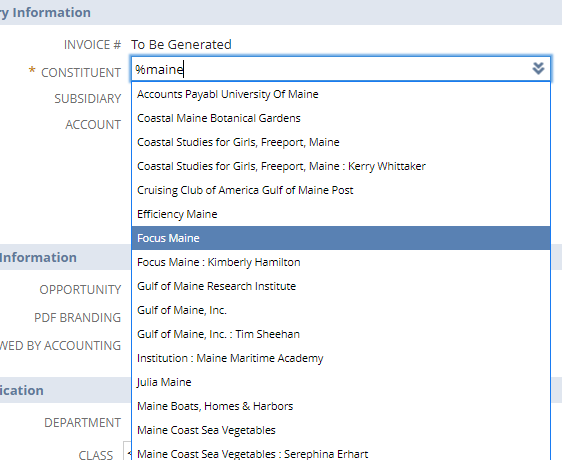
- Start typing the Constituent name to search and select from the list (use the % symbol if can't remember the exact name of the constituent as that will pull all constituent records with that word included):
- If the Constituent is new and does not currently exist in NetSuite, click on the '+' button to create a new Constituent record and another screen should open for you:

- First select the type of form to use (use 'NFP - Constituent' unless instructed to use another option), and then select 'Company' or 'Individual'.
- From there the form will alert you to fill out any required fields as noted by a red asterisk. Click 'Save' once complete and that new Constituent will then be tagged to your new invoice.
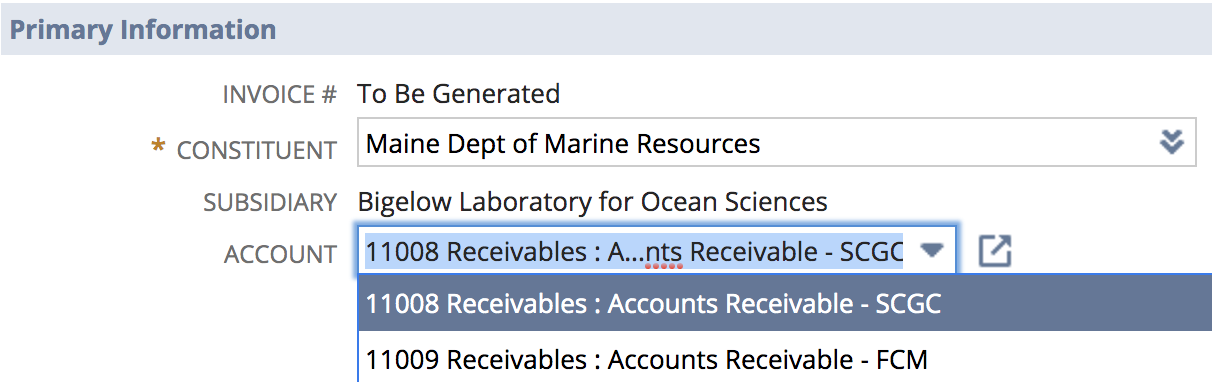
- Confirm Account code is correct (use 11001 as default if other accounts are N/A to you)
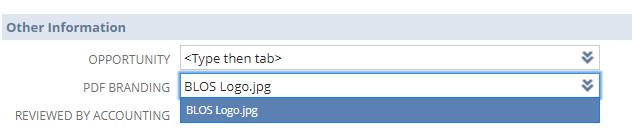
- If relevant, select PDF Branding logo
- Enter information you would like to have appear on the final invoice into the Notes field

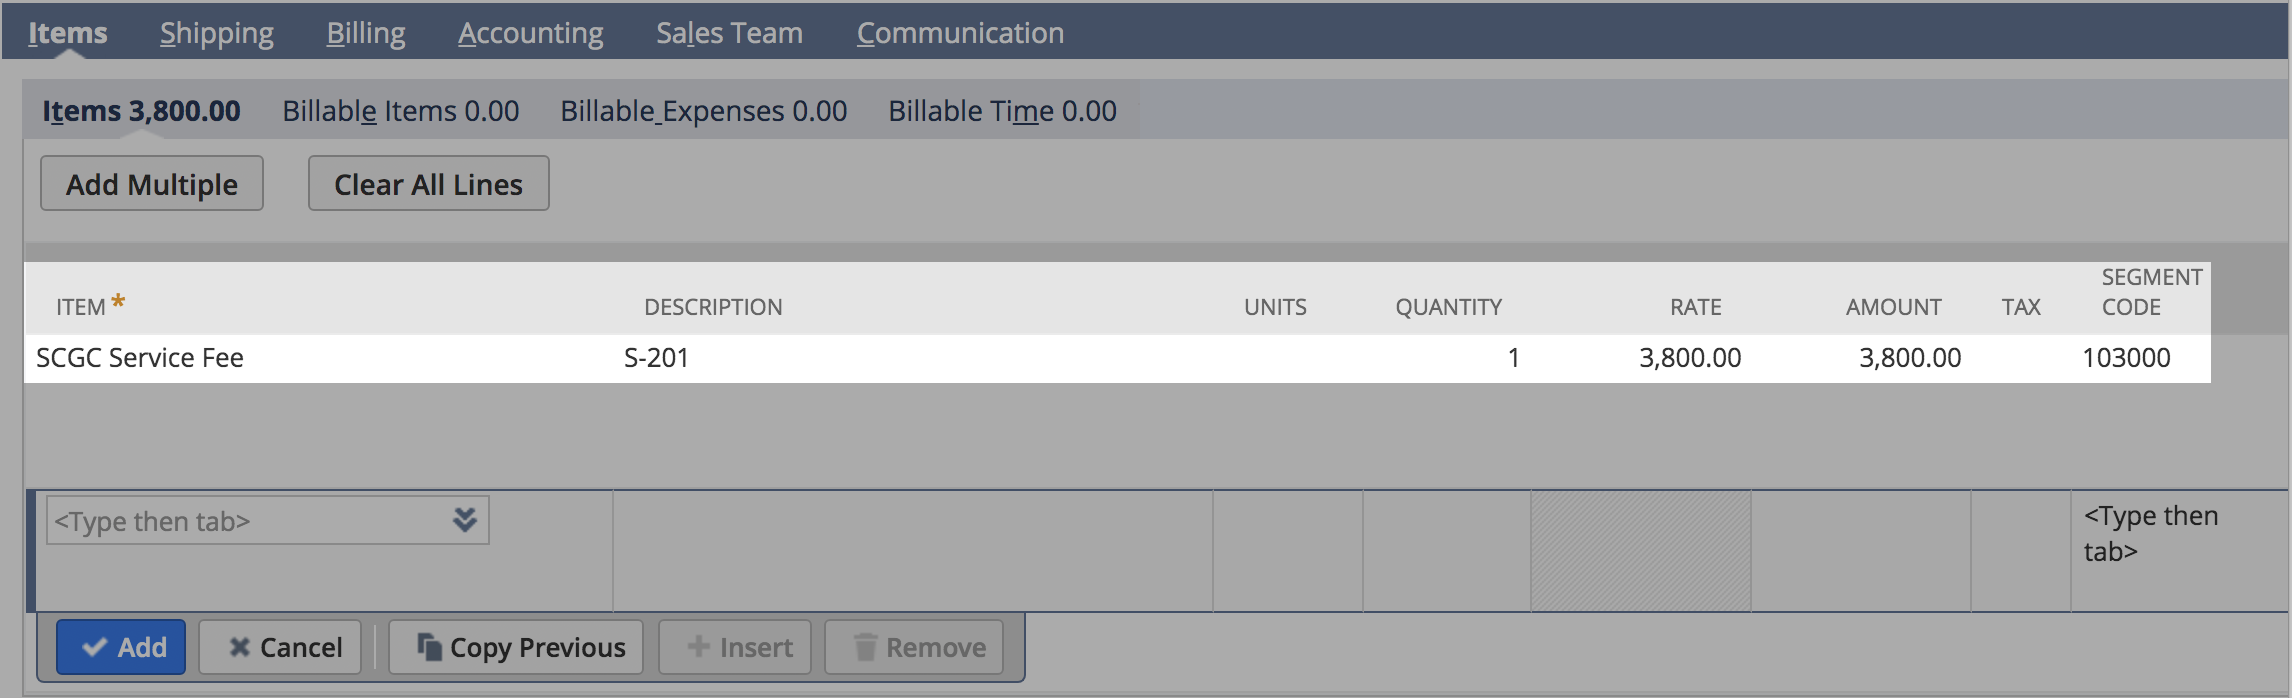
- Enter Item, Description, Amount (and also Quantity and Rate if applicable/relevant/useful), and Segment Code. Then click Add for another line if another is desired and/or when all items have been entered so that the final total appears.
- If you receive an error message asking to enter a Segment Code, it's likely because you've started another line and your view might look something like this:
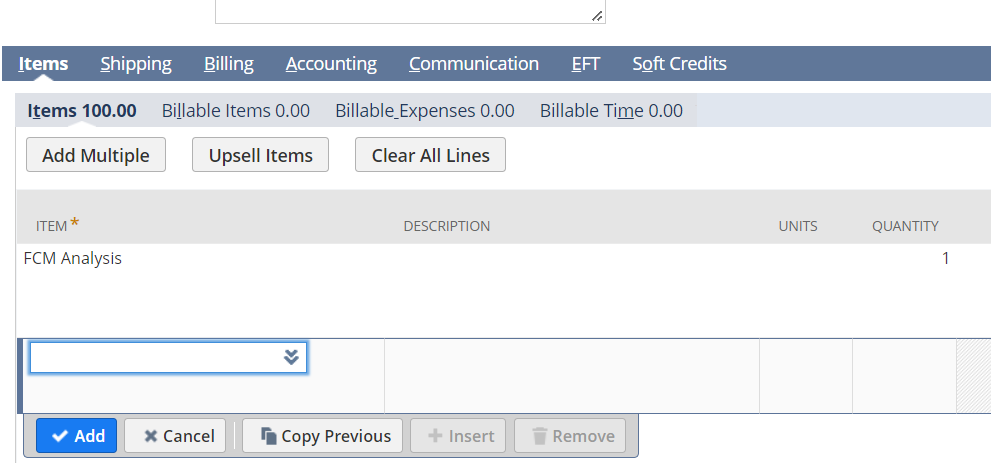
- Should this happen, just click on the line above so that the system knows you aren't trying to add another line with missing information.
- If you receive an error message asking to enter a Segment Code, it's likely because you've started another line and your view might look something like this:
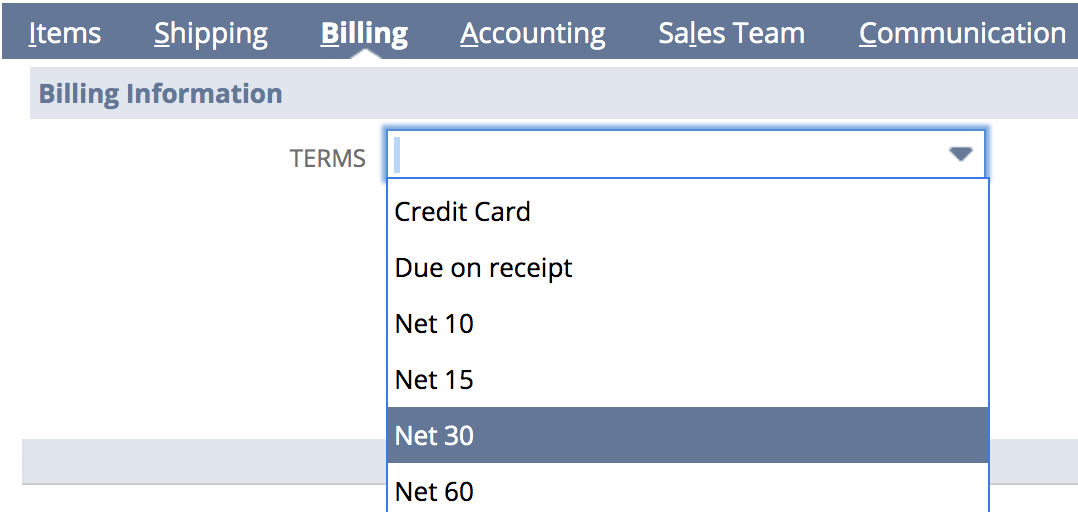
- Select Terms
- To Enter a Billing Address, select Custom
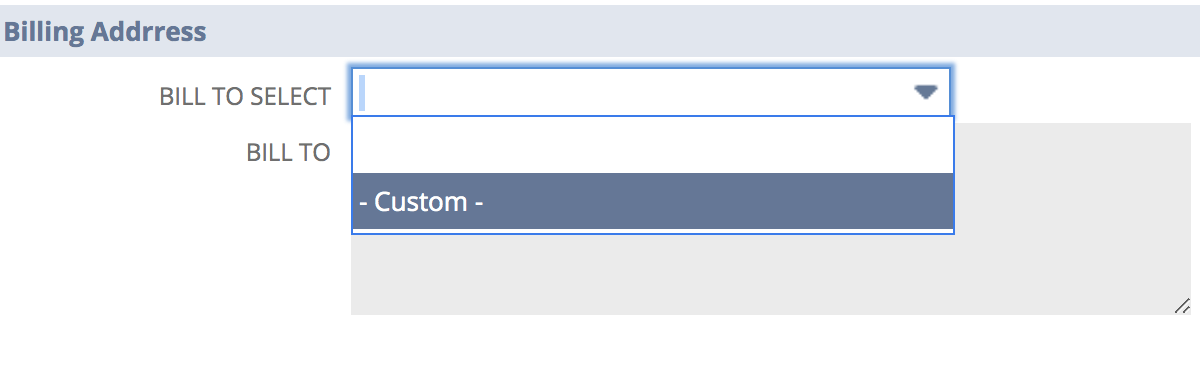
- Then click on the box with arrow to the right of Bill to Select field

- Enter and then Save Address information into the window that popped up
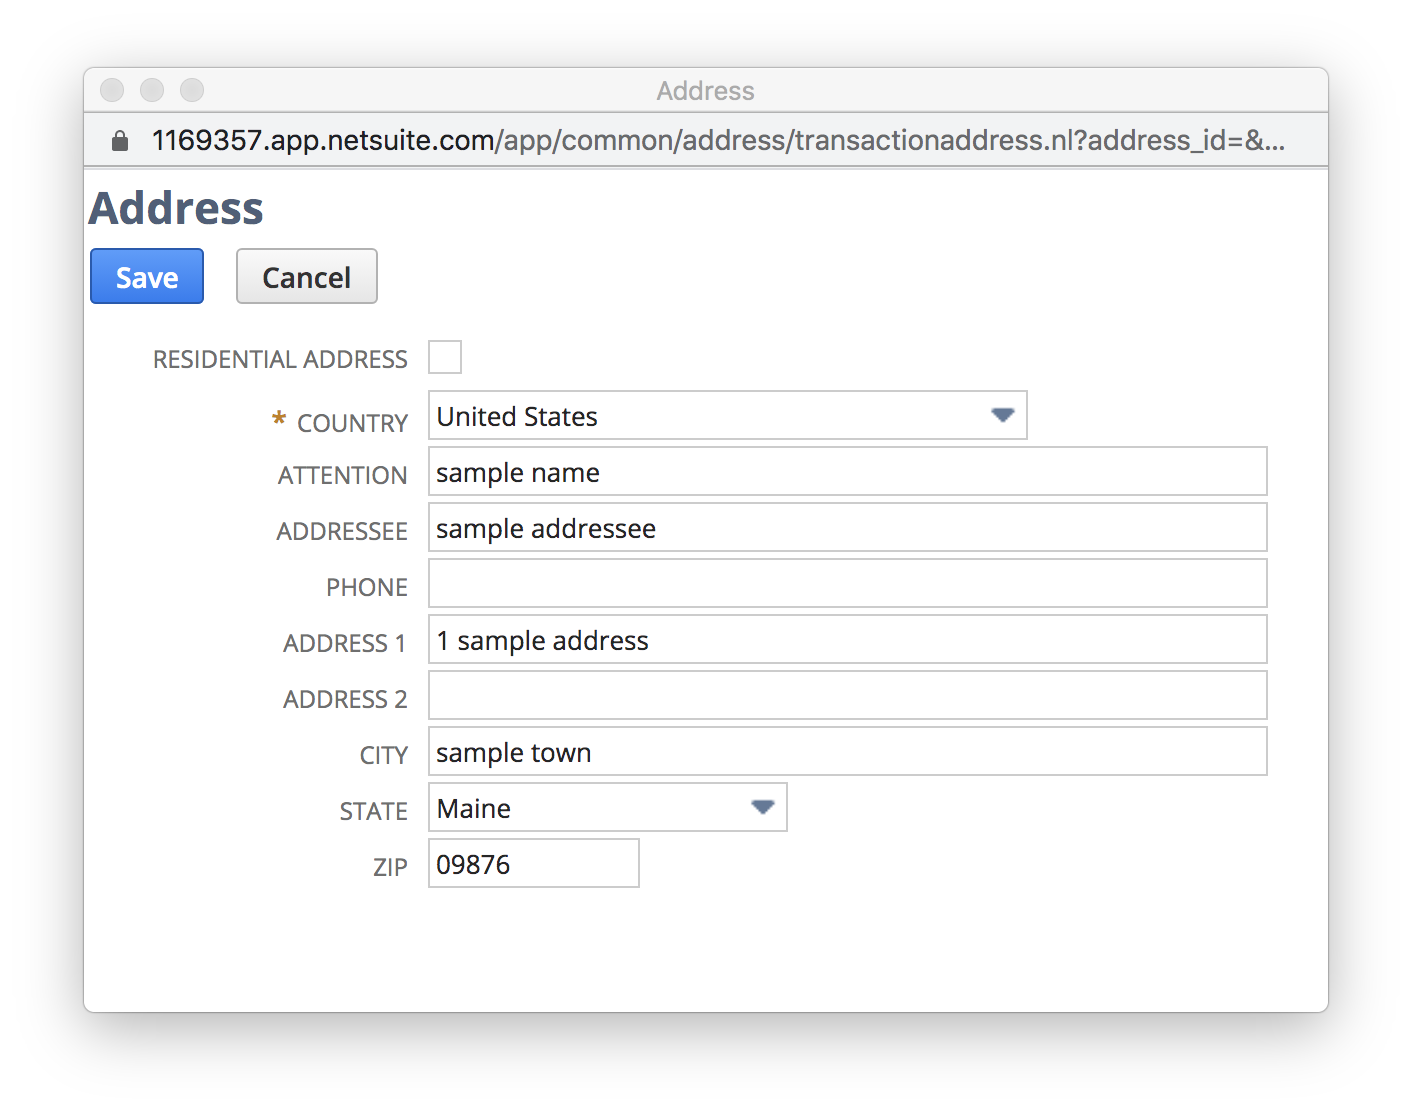
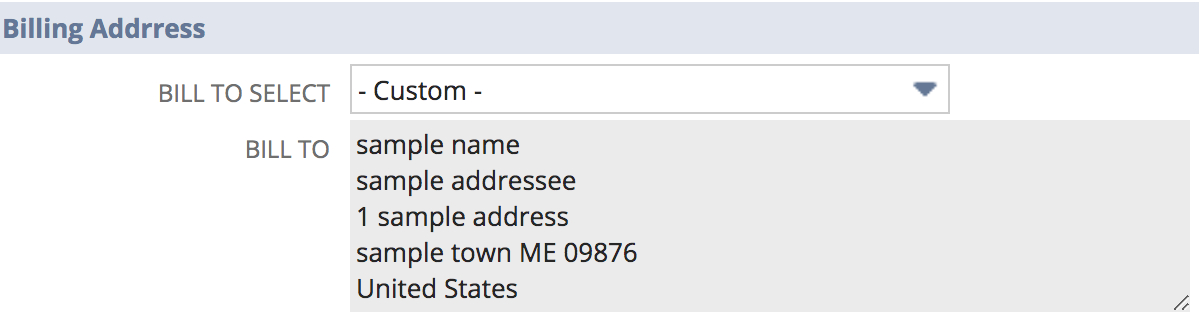
- Confirm that Address information entered is correct
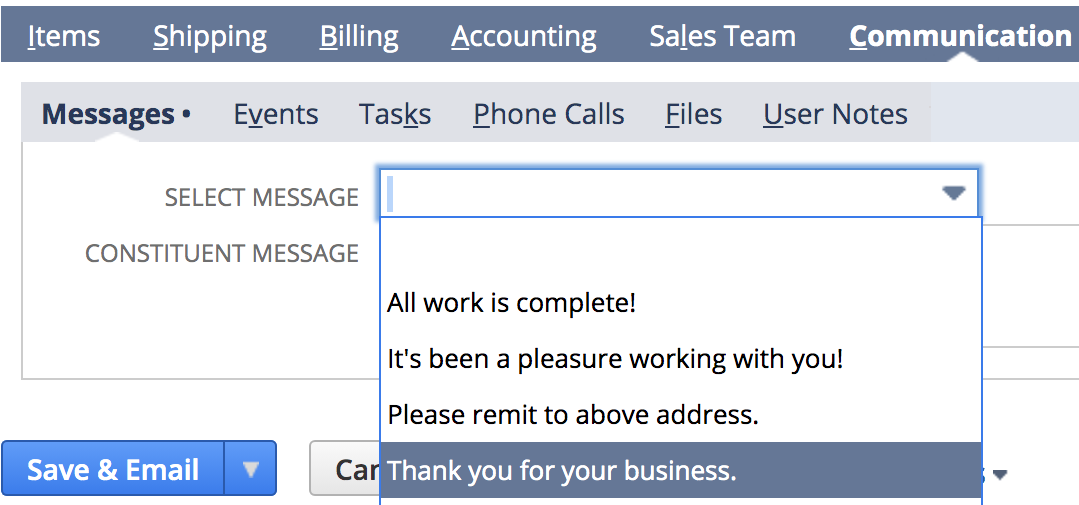
- Navigate to Communication > Messages and either Select Message (that will also appear as the Constituent Message) OR enter a Constituent Message
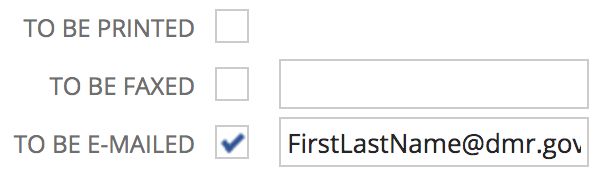
- Check To Be E-mailed box and then enter email address of desired recipient
- Note: if you wish to send to multiple individuals, you'll need to save the record first, then return to the Communications tab where you can create an Email and add multiple recipients:
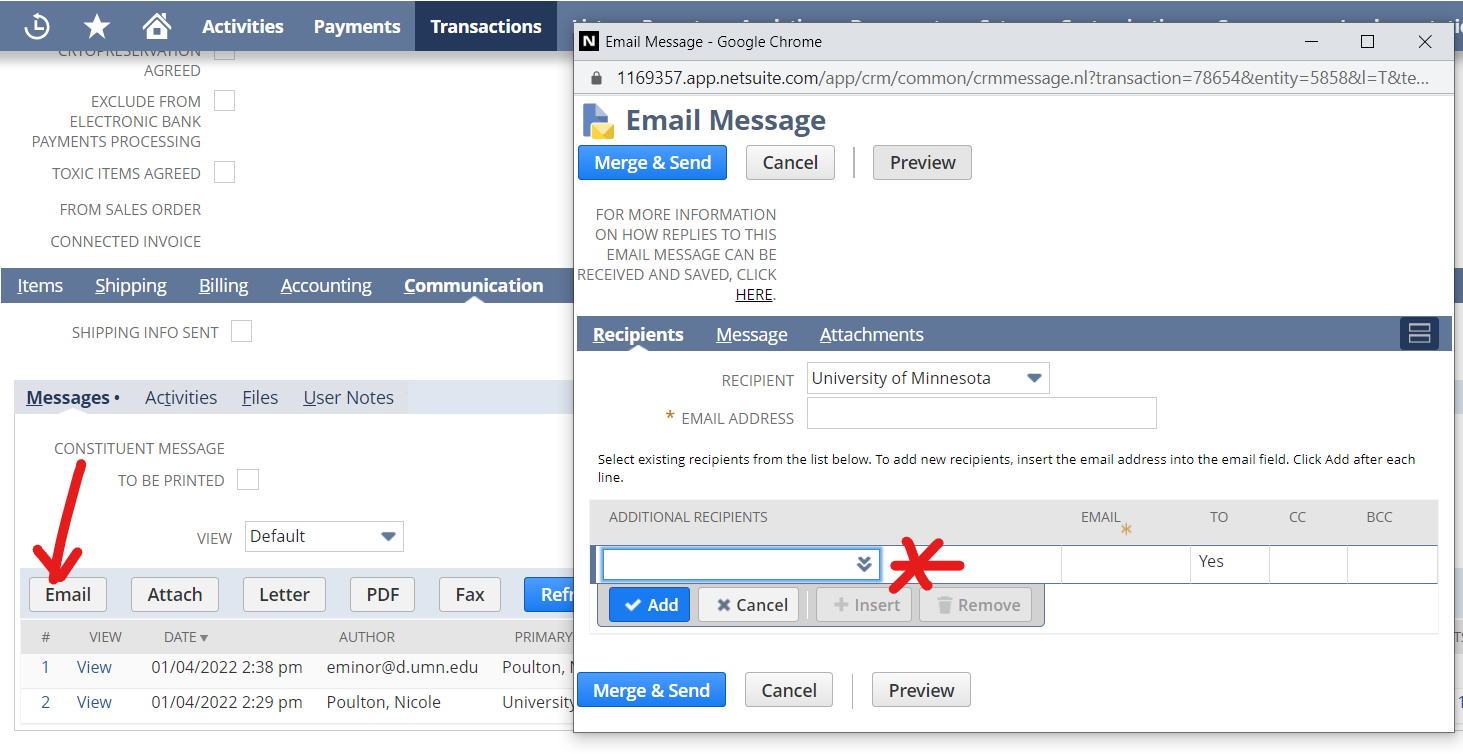
- Note: if you wish to send to multiple individuals, you'll need to save the record first, then return to the Communications tab where you can create an Email and add multiple recipients:
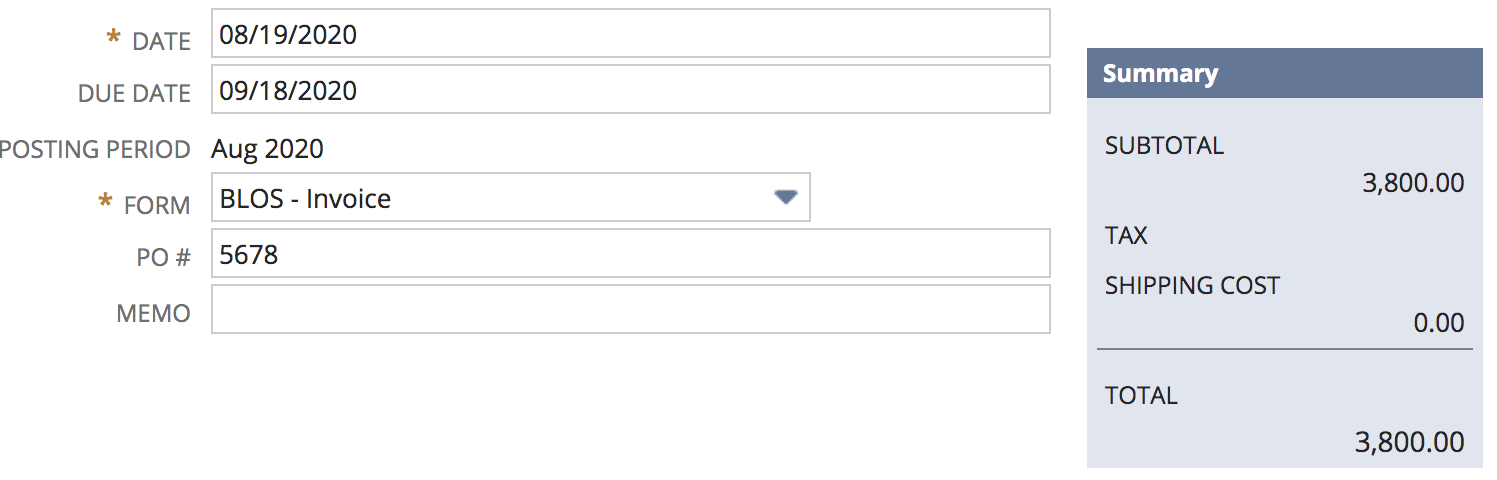
- Under Primary information at the top, confirm Due Date is correct and enter a PO# if the constituent provided one that should be referenced on the invoice
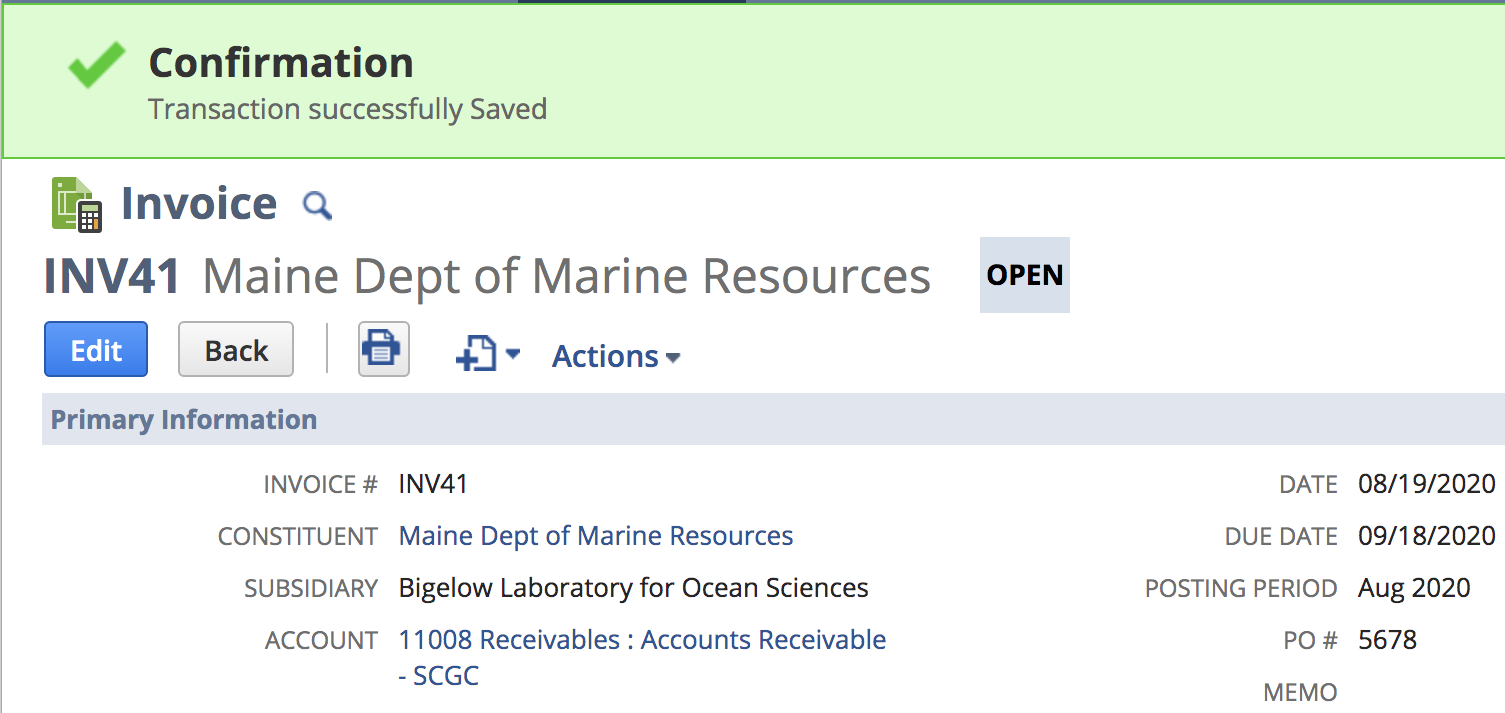
- Click Save and observe confirmation that the 1) transaction was successfully saved and 2) INV# was assigned
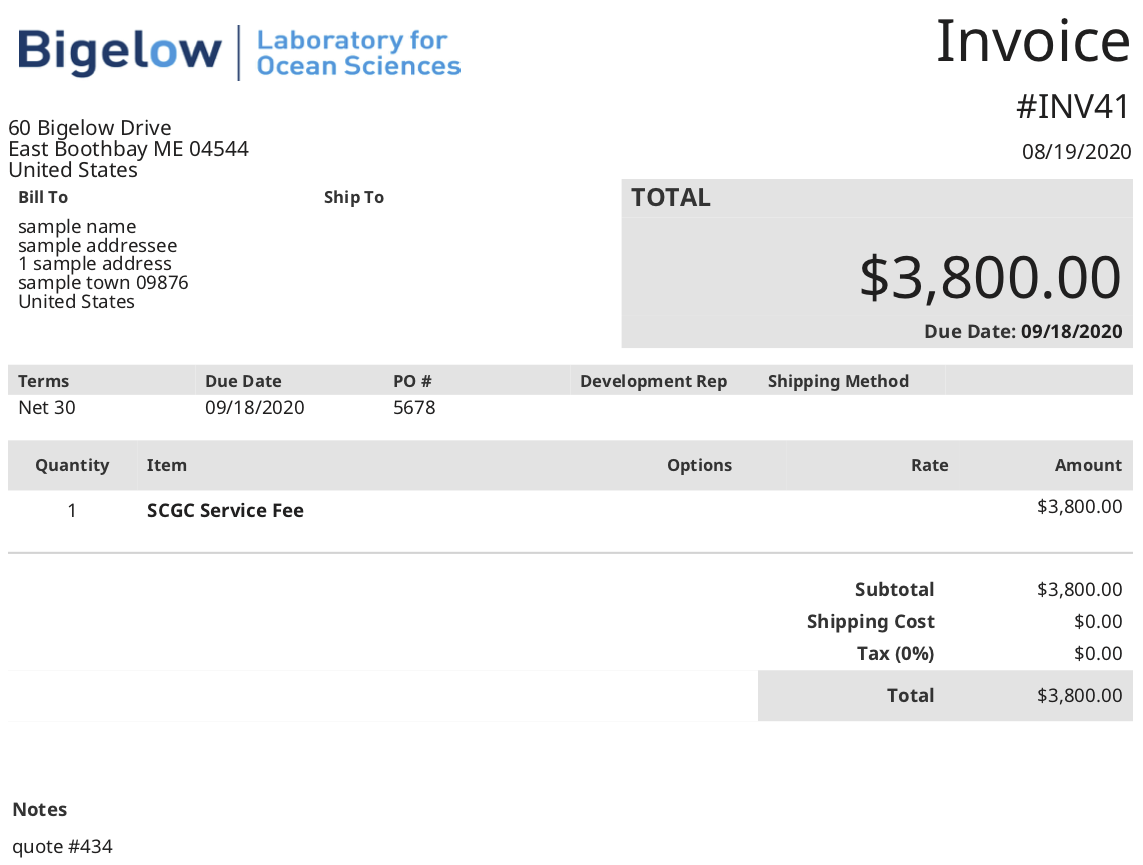
- This is how the invoice appears if you save it as a PDF