General
Best Practices
Event Procedure
Helpdesk Request Form
Lab Closure Procedure
Links
Resource Drive Conventions
Resource Map
Shipping (FedEx)
Shipping (International)
Suggestion Box
Support Article Guidelines
Welcome
Information Technology
Email & Calendar
Add Calendars to iPhone
Calendar Resources
Confidential emails
Create a Shared Calendar
Create an Email Group
Email Filters & Rules
Email Groups
Email Headers
Email Signatures
Google 2-Step Verification
Google Calendar Overview
Phishing
Schedule emails
Staff Minus One Emails
Using Outlook with Gmail
Yubico Security Keys
Print & Fax
Software
1Password
Adobe Acrobat DC
Adobe Creative Cloud
ArcGIS
Colby VPN
Combine PDFs in Adobe Acrobat
Excel Trust Settings
Install Falcon Antivirus
Microsoft Office
Microsoft Office Runtime Error Fix
Mosyle Mac Enrollment
Raiser's Edge
Slack
Software Resources
Uninstall OpenVPN
Windows 10 - Restore from backup
Updates
2020 December - email name spoofing
2020 October - COVID resources
2021 December - WiFi
2021 January - Zoom recording + private chat
2021 March - NetSuite Google authentication
2021 March - VPN Upgrade
2023 - Zoom Updates
2024 May - VPN SSO
Account Access
Artificial Intelligence
DNS
Data Storage and Computer Backups
Google Drive
HPCC and Storage Proposal Information
Intercom
Laptop Recommendations
Loaner Hardware
Migrating data from Storage to Google Drive
Passwords
Phones
Restoring Files
Storage
VPN
Vendor Access
Website Request
WiFi
Zeiss Digital Classroom
HR & Payroll
Paid Time Off
Payroll Overview & FAQ
Personnel Offboarding
Personnel Onboarding
Timesheet Approval (supervisors)
Timesheets
Facilities
Finance
Admin
Budget & Reports
Invoicing
Policies & Procedures
Advancement Entry of Donations and Pledges
Corporate Traveler / Melon
Gas and Cryo-Supply Ordering Process and Form Link
Purchasing Flowchart - for staff reference
Purchasing Policy
Vendors Exempt from Purchase Orders
Proposals
Purchase & Expense
Bill/Invoice Approval
Creating a Bill to be Paid
Equipment Capitalization Help
Expense Report
Expense Report (example)
Non-Employee Reimbursement
Purchase Order
Purchase Order (example)
Purchase Order (supplemental)
Recurring Purchase Order (SRS)
Amazon.com
Approval Reminders
Business Office Orientation
Capital One - Corporate Credit Card
Customize Dashboard
Dashboard (SRS)
NetSuite FAQ
NetSuite Login
NetSuite shortcuts
Revenue Flow Chart
StaplesAdvantage.com
Workshop, Training Projects, and Participant Support Help
Computing
Software
AAI Calculation
ANI Calculation
AlphaFold
Anvi'o
Conda environments
Jupyter notebook
Prokka
RStudio
dada2
sag-mg-recruit
Job management
Charlie Overview
Connect to Charlie
Edit with VS Code
Getting Started
Monitor jobs
Software modules
Transfer files
Zoom
Closed Captions
Join Teams or WebEx meeting from a Zoom Room
Schedule a Zoom Meeting
Screen Share (Dummy HDMI)
Screen Share (Presenter Mode)
Sign Up and Download Zoom
Zoom Overview
Zoom Room Instructions
Zoom Room: Alfond Room
Zoom Room: Commons
Zoom Room: Conference Rooms
Zoom Room: Forum and Classrooms
Zoom Room: Sage Meeting Room
Zoom Room: Teaching Laboratory
- Home
- Finance
- Admin
- E-Commerce
- Upload New Bin Numbers
Upload New Bin Numbers
Updated
Step 1: Generate bin numbers
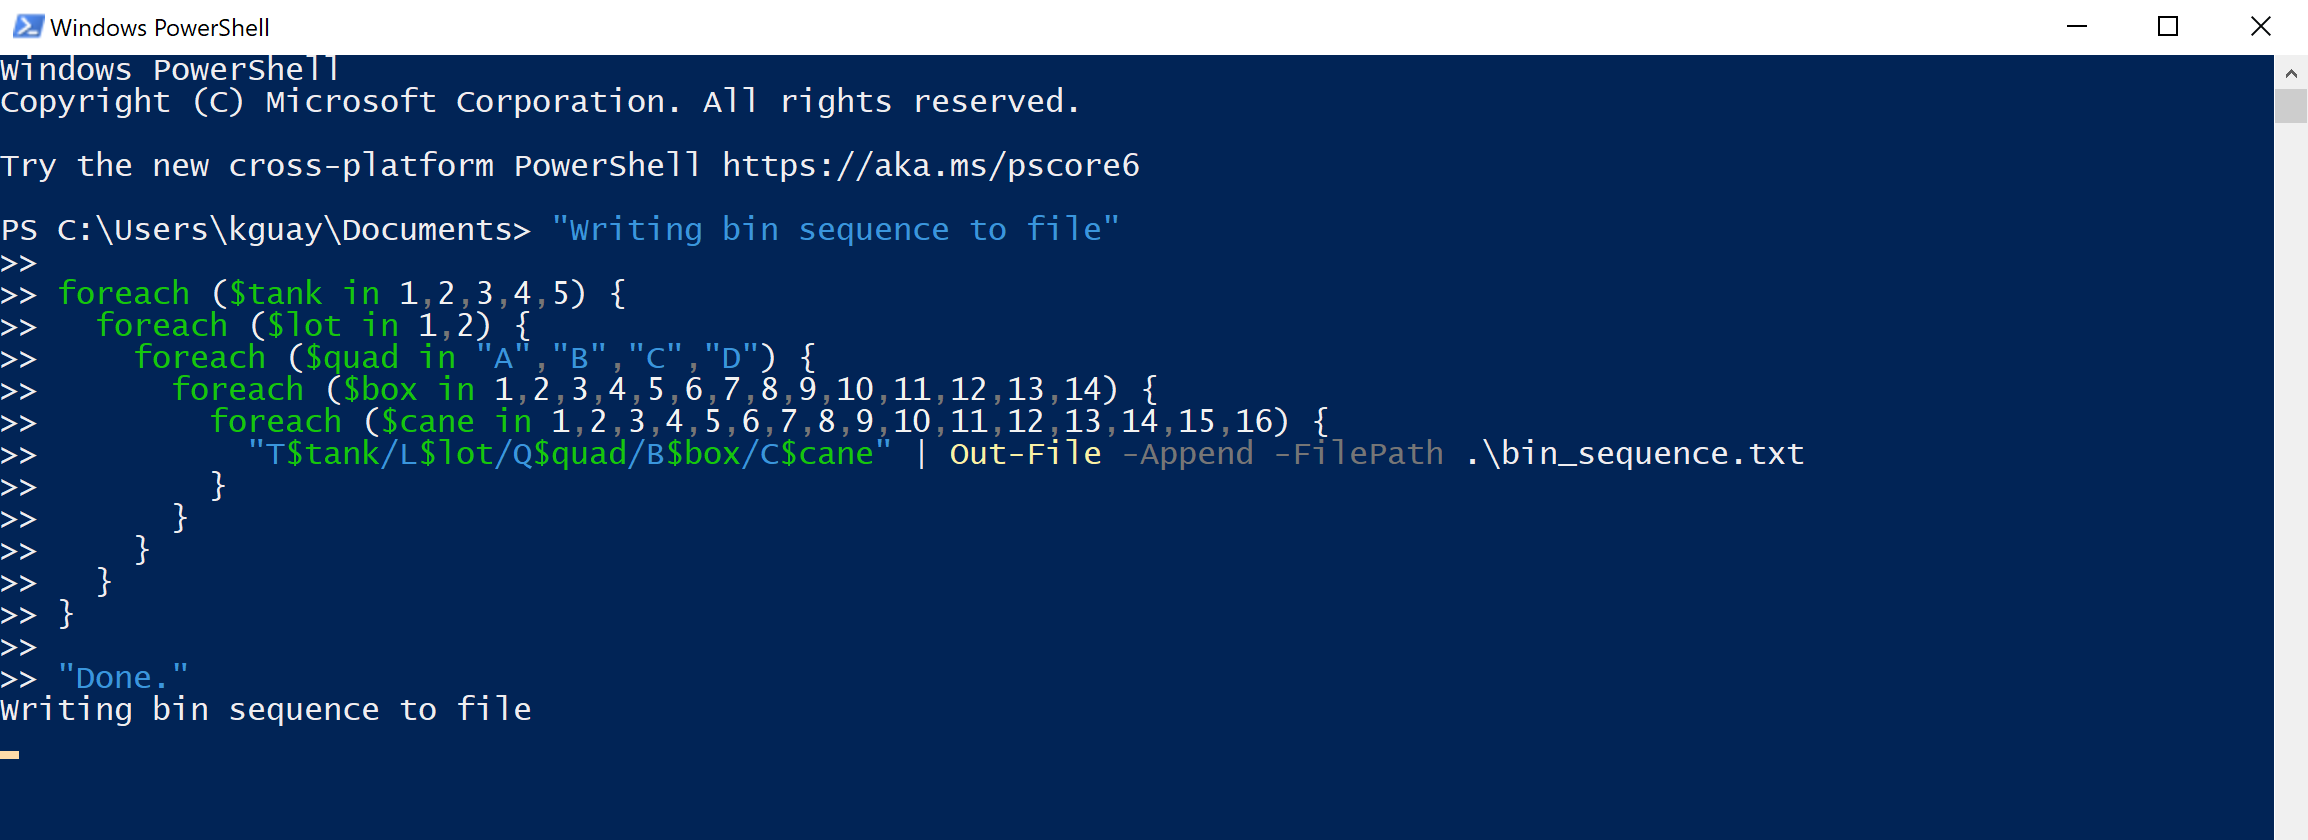
The following powershell script will generate bin numbers in the format T1/L1/QA/B1/C1. The main part of the script consists of five nested foreach loops that correspond to the bin levels (first loop is tank, second is lot, third is quad, etc.)
You can edit this script to add tanks, lots, etc. For example, to only print bins for a new tank #6, change the first foreach line to foreach ($tank in 6) {
"Writing bin sequence to file"

foreach ($tank in 1,2,3,4,5) {
  foreach ($level in 1,2) {
    foreach ($quad in "A","B","C","D") {
      foreach ($box in 1,2,3,4,5,6,7,8,9,10,11,12,13,14) {
        foreach ($cane in 1,2,3,4,5,6,7,8,9,10,11,12,13,14,15,16) {
          "T$tank-L$level-Q$quad-B$box-C$cane" | Out-File -Append -FilePath .\bin_sequence.txt
        }
      }
    }
  }
}

"Done."
E.g. F10-S3-L4-C4-P9
To run the script:
- Open a File Explorer window
- Navigate to the folder where you want the output file to be
- In the address bar, type "powershell" and click "enter"

- Copy and paste the code above (with any modifications) to the powershell window and click enter

- You should see a blinking cursor under "Writing bin sequence to file". Wait until it says "Done." Now your file is ready. Look in the open file explorer window for a file named bin_sequence.txt that contains the new sequence.
Step 2: Copy bin numbers into template file
- Download the bin template file
- Open the file in ExcelOnly the first three columns (externalid, binnumber, and location) are required. The externalid and binnumbers should be the same (i.e. A3 and B3 should be the same bin number; see example rows).
- Copy and paste the bin numbers from bin_sequence.txt (from step 1) into columns A and B.
Step 3: Upload file to NetSuite
- Log into NetSuite
- Navigate to Setup > Import / Export > Saved CSV Imports
- Click on 118 - BLOS - Bulk Bin Addition
- Under the CSV Files section, click Select. Upload the bin template CSV file
- Click Next
- Click Next on the Import Options screen
- Click Next on the File Mapping screen
- Click Next on the Field Mapping screen
- Click on the arrow next to "Save As & Run" and select "Run"
- You can view the status of your import by navigating to Setup > Import / Export > View CSV Import Status